

Design your App or Website now for FREE
The most easy way to design you apps or websites, only 20 minutes


You must design your Website or App instead of rushing to programming, if you value your time and you don't want to waste it!
Those apps are really easy and fast to learn, so it will take only a few minutes.
Not only you can design you can even prototype and see how it will look line in various devices, you can even try it on a physical device.

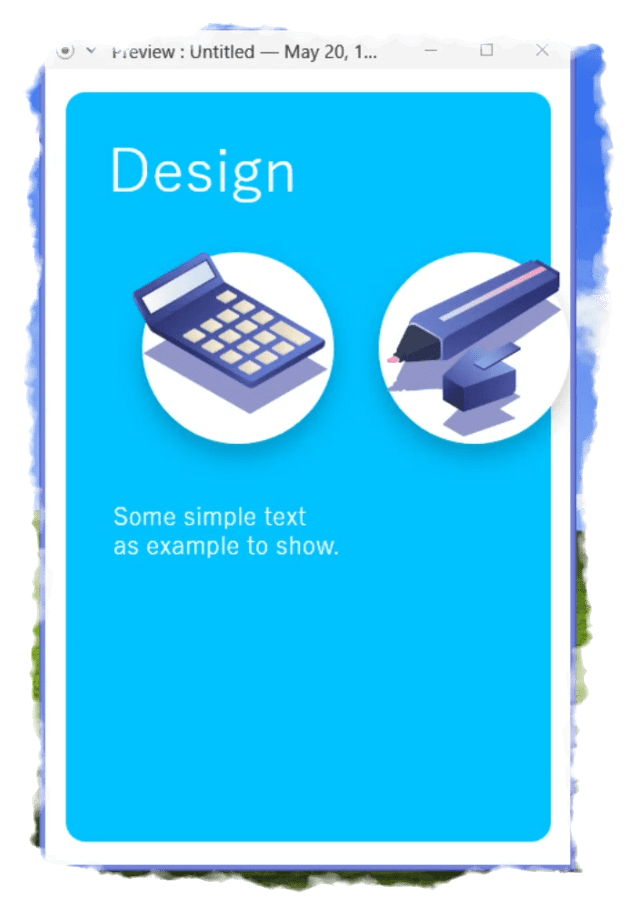
I suggest 2 applications, the ones in the image above
BUT, You should take into consideration that... Figma is used in your browser and can be used anywhere, even if you are using Linux, Adobe Xd can be used only by Mac and Windows users.
The cool thing about Figma is that now you can open it in any place you want you just need a connection, and a browser, not installations required;
If you have an iPad you can open it with an App called figurative, sadly Adobe XD it is not accessible, since the Application present on the IOS store is only used to test the result of your prototype :slightly_frowning_face:
Using Adobe XD you must have it installed with the Creative Cloud sync (Place where you have stored all your adobe files) you can get your document from the network.
Both offer a Free version, which is perfect to get started.
inshAllah we are going to see how to use Figma, don't worry about Adobe XD you can find the same written tutorial at the end!
Video or Article?
How to use Figma (Fast easy tutorial)
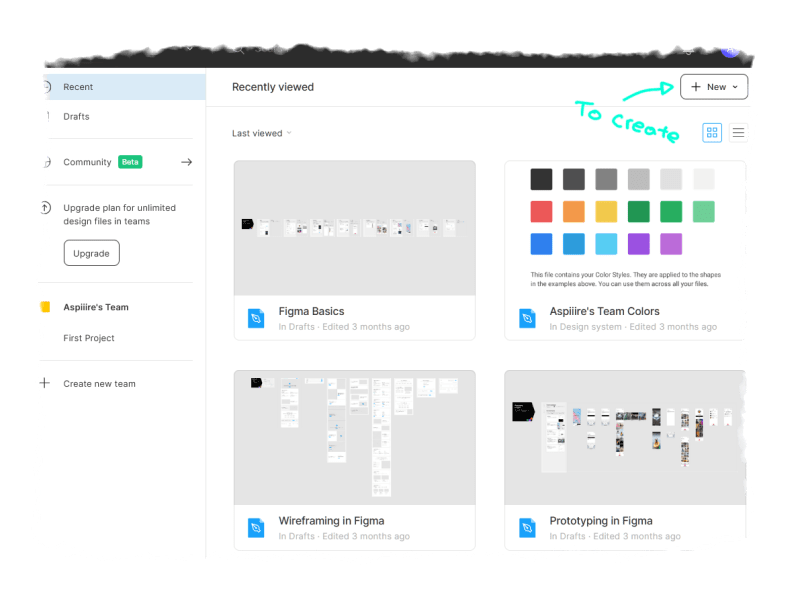
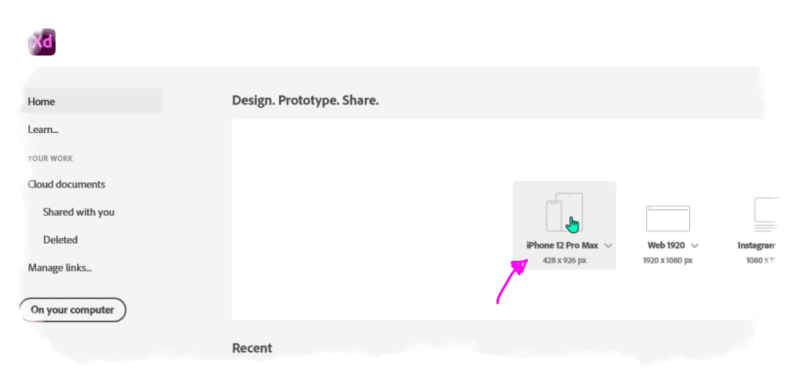
After you log in, you will see a screen like this one, if you press the upper right part (Where the arrow is pointing) you can create a new document.
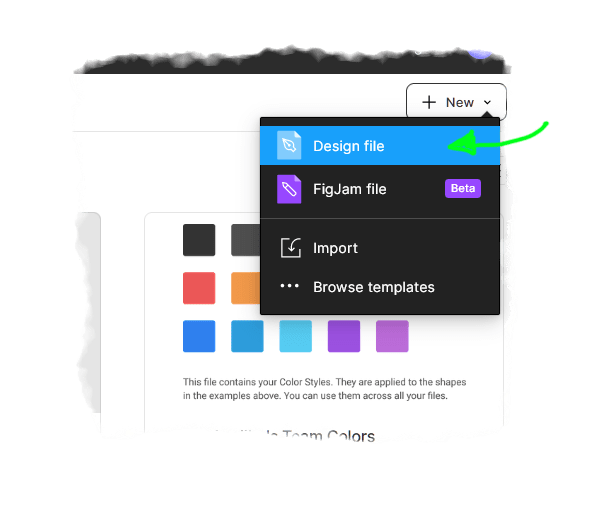
Now click on "Design File" to create your document.
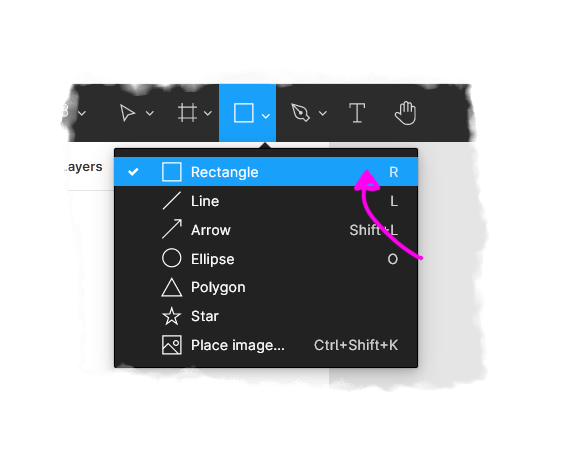
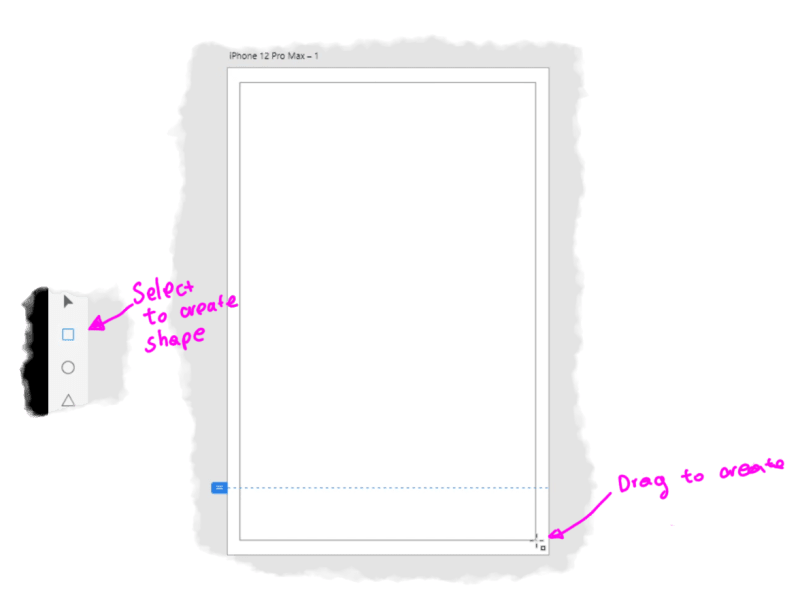
You have just created a new document, you will see this upper menu with all the tools that you need to design your super cool stuff.
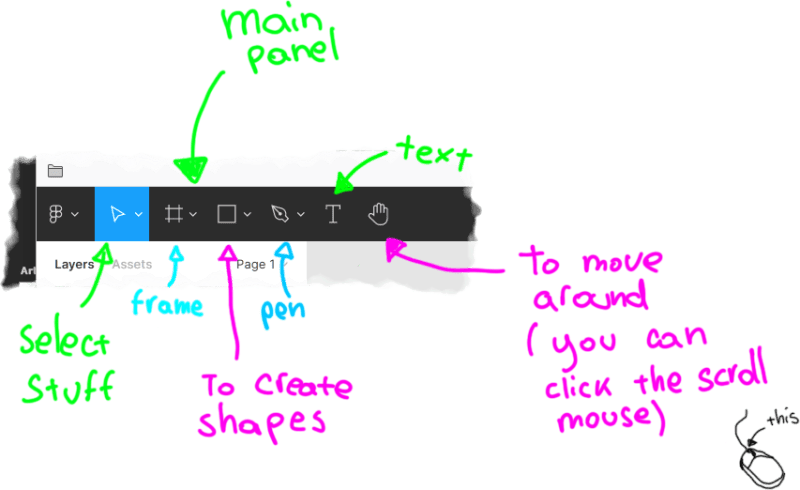 The tools in order are:
- Selection tool to select objects
- Frame tool to create frames
- Create shapes or place images
- The pen tool to create paths
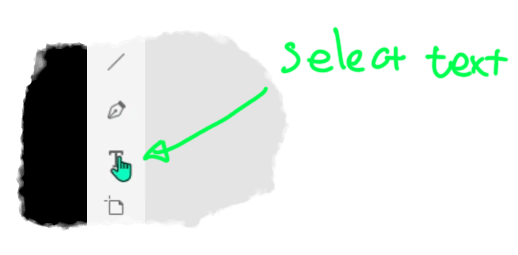
- To create text
- To move around, you can click the middle mouse to move around
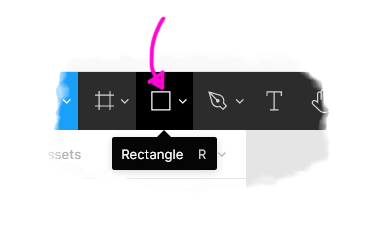
Now that you are ready to jump in, let's select the rectangle, so we can draw some stuff.
If you click the arrow near the square icon a popup will appear with all the shapes that you can insert, not only this but even images.
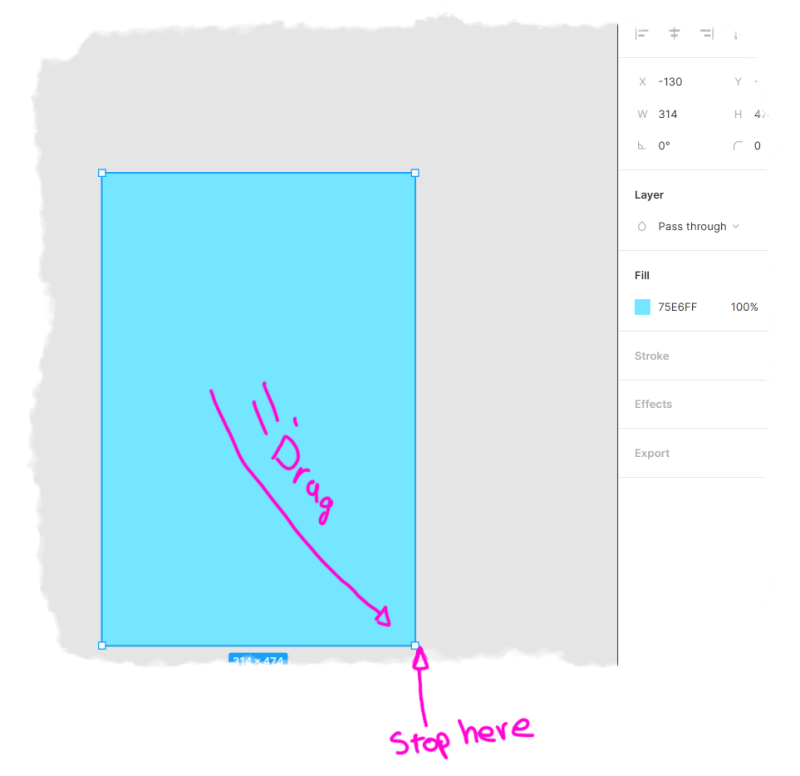
Now let's create a simple shape, you have to click on the blank space, move your mouse until you create your rectangle then release the mouse click.
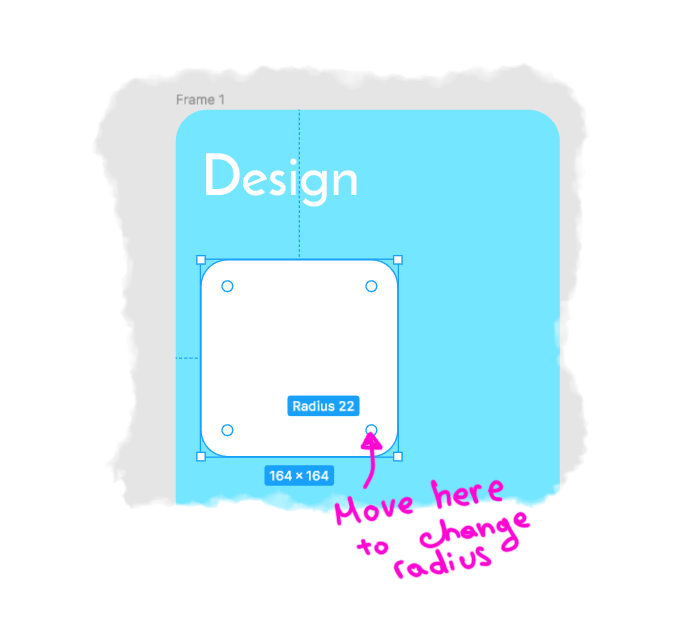
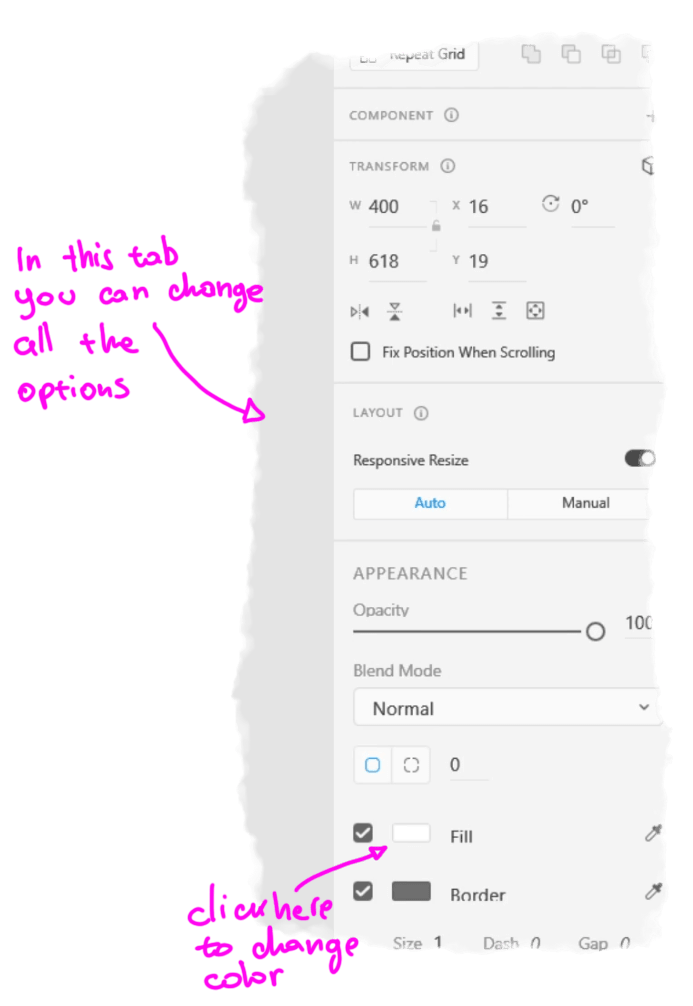
You can always adjust it at your liking, for more precise maturations you can use the right panel to change the Width near "W" or Height near "H".
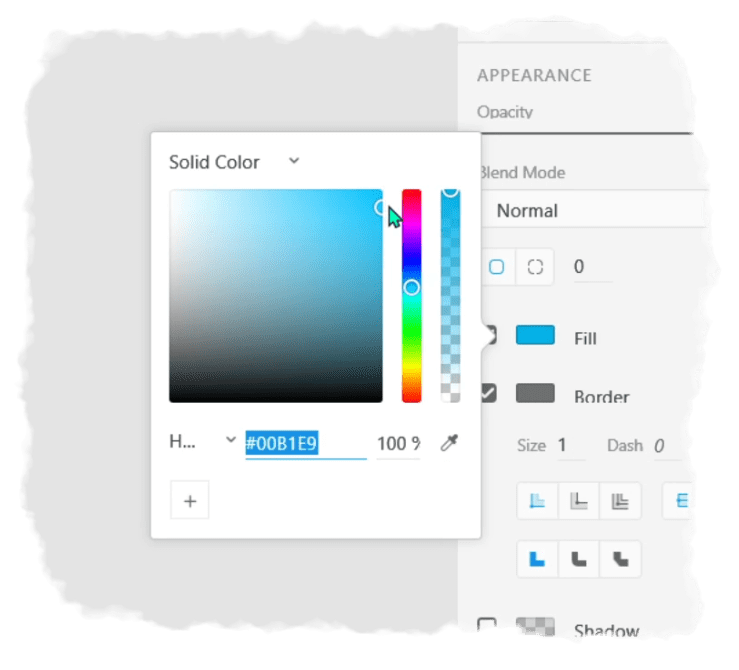
In the same panel, you can change colors by clicking the cyan rectangle.
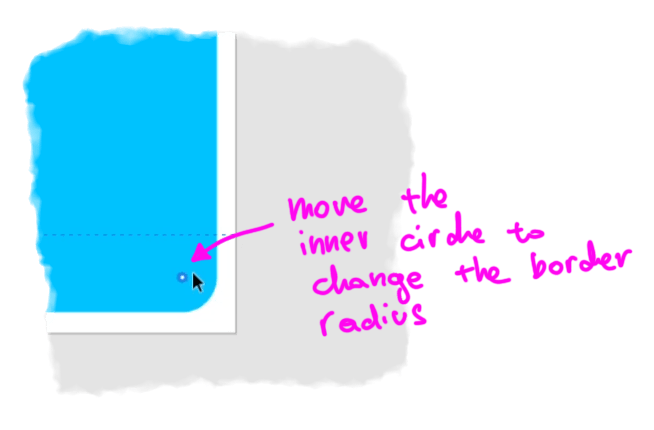
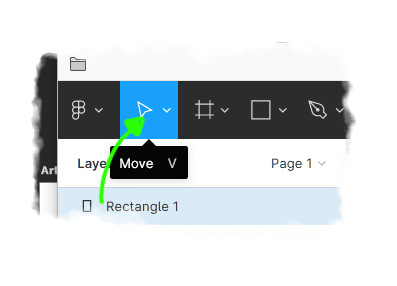 Now from the panel use the move tool. we want to change our borders radius.
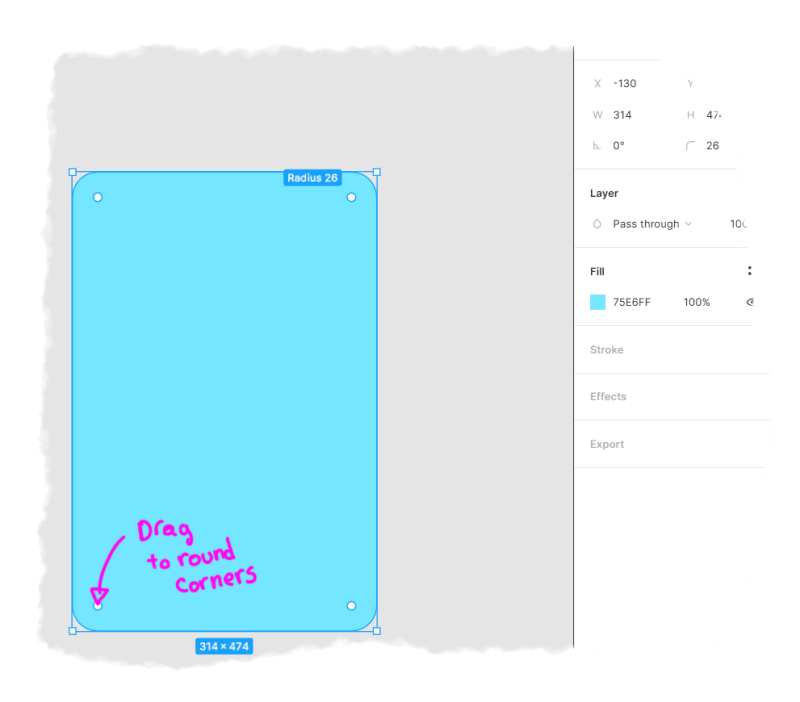
Simply drag from the inner dot to start changing the corners. You can do this operation from the right panel too; Near the corner symbol under "H" present in the image, where you can see the value 26.
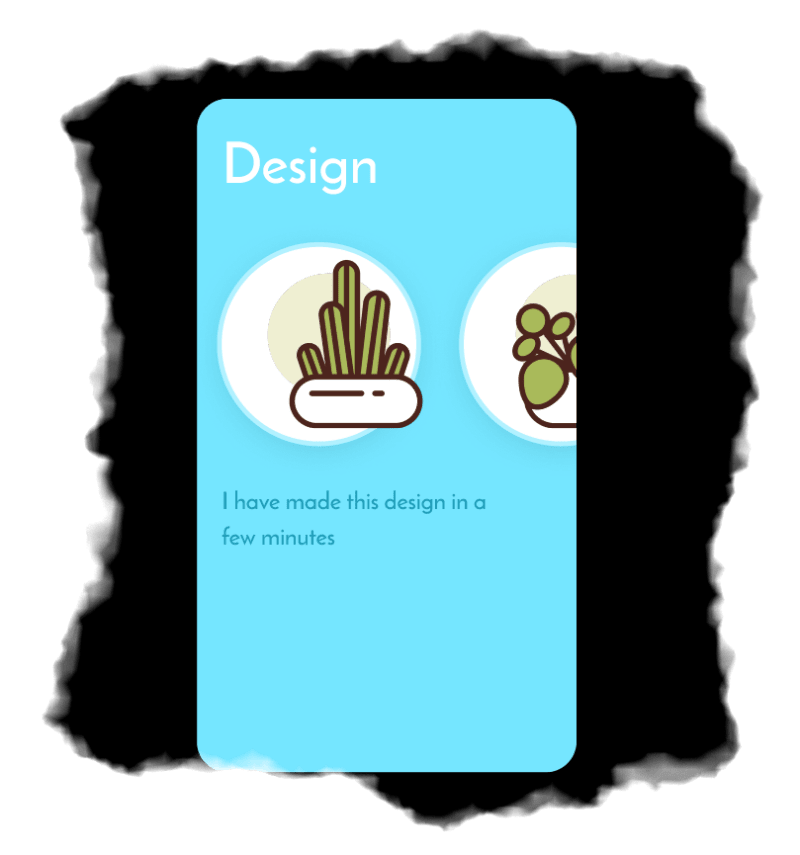
By applying these steps you can play as you wish and easily you can come up with really cool stuff just like the one that you see here, basically, now we are ready and done with the first screen.
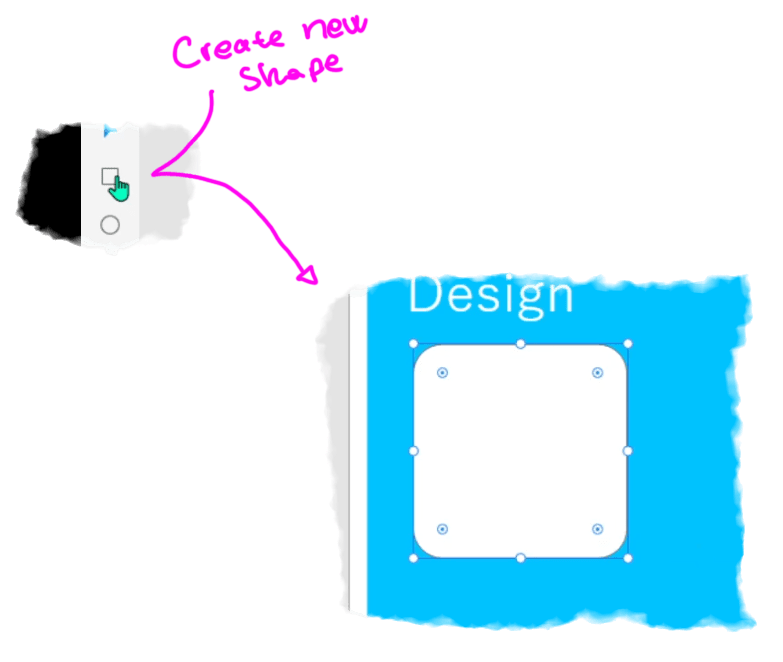
 Now let's select the rectangle by clicking on the rectangle tool, NOT the arrow since in this way it will open a menu with all shapes.
Create a new simple square; I suggest you press shift and then create show it will lock the width and height and you'll get a perfect square instead of a rectangle.
After doing so if you move one of those inner circles you are able to change the box radius, you can do this from the right properties panel too.
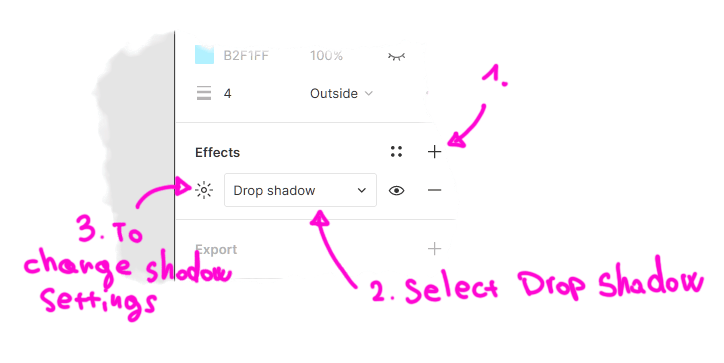
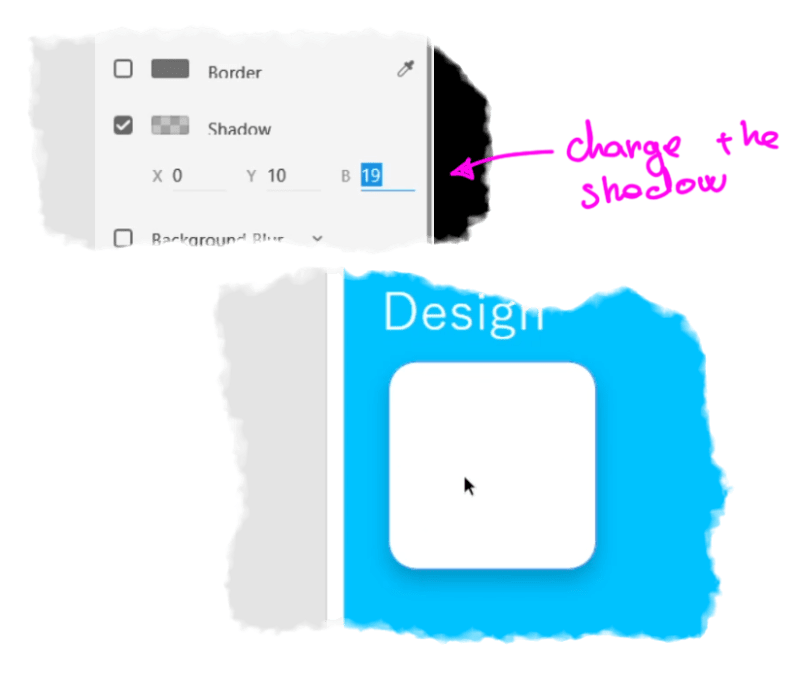
Now let's add a light shadow; From the right panel, near effects, click the plus button e choose dorp shadow as effect, then click the sun icon near the drop-down input and tweak your shadow as you wish.
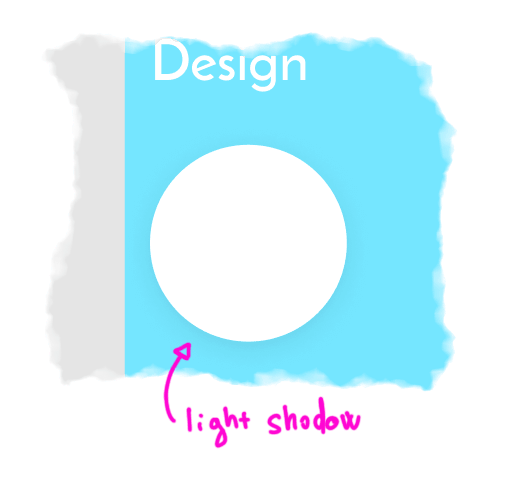
It should look like this one, it's barely visible.
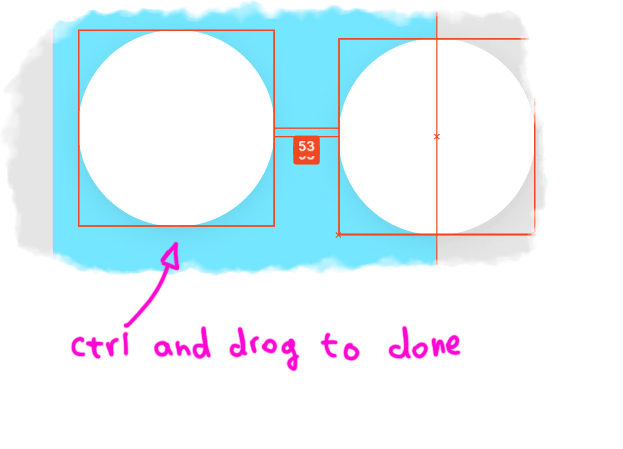
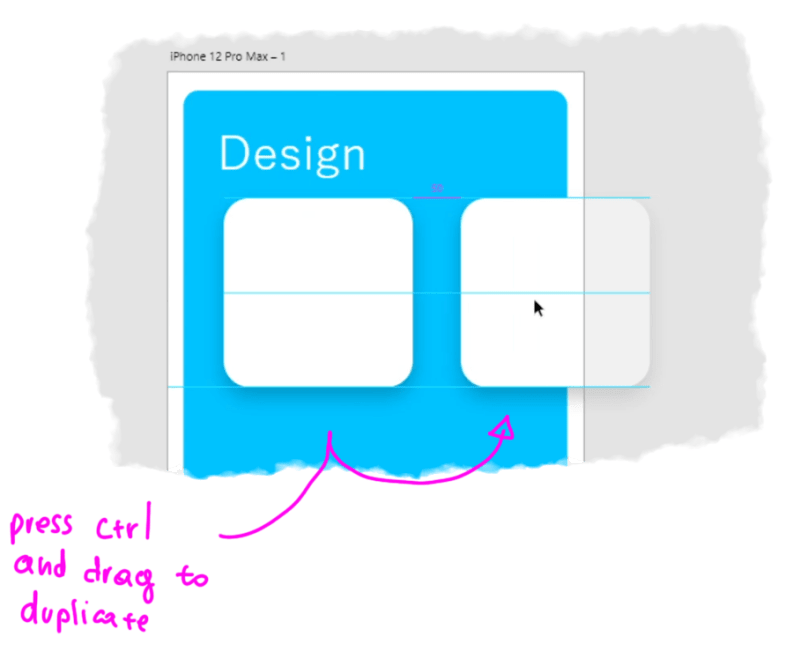
Now press ctrl then drag to the right of our circle to clone it.
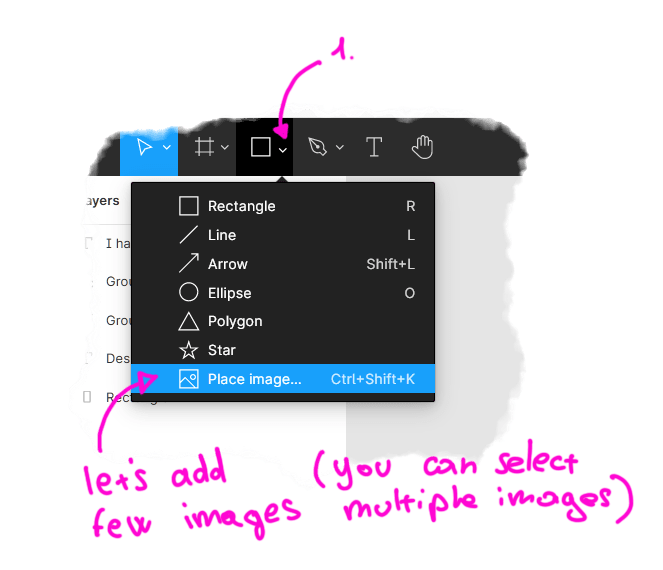
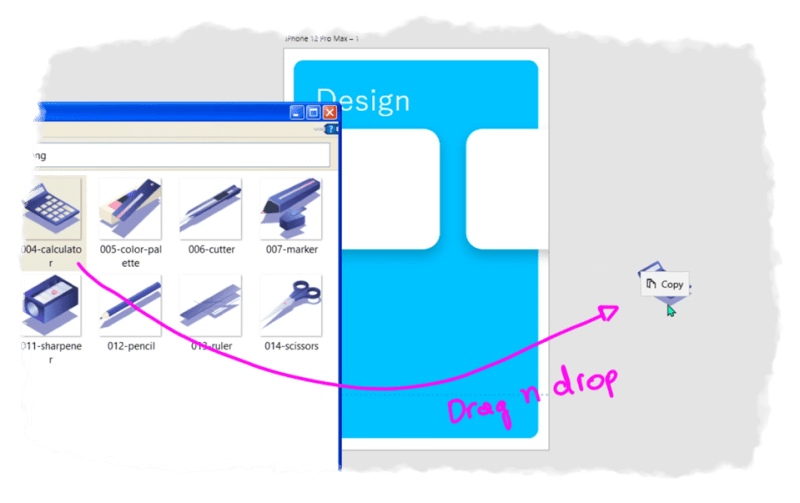
We want to add some icons to add inside our created boxes. Basically, to do so we should first press the right arrow near the shape, you will see a "Place images..." click it and you are ready to go.
You can even upload multiple images if you, want or need them.
In my case, I'll upload 2 images.
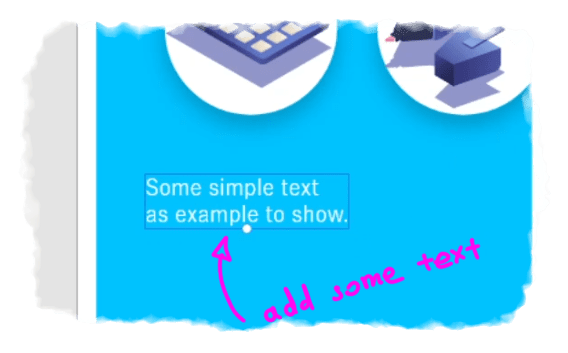
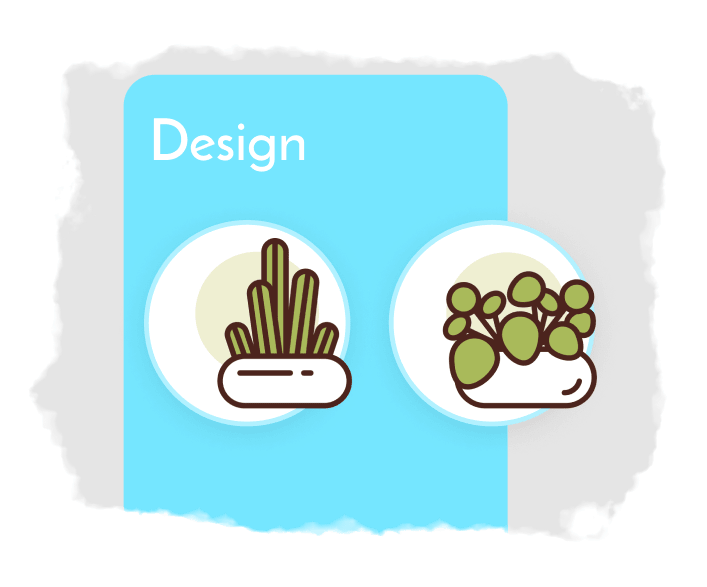 This is how it should look like after moving the images inside our circles!
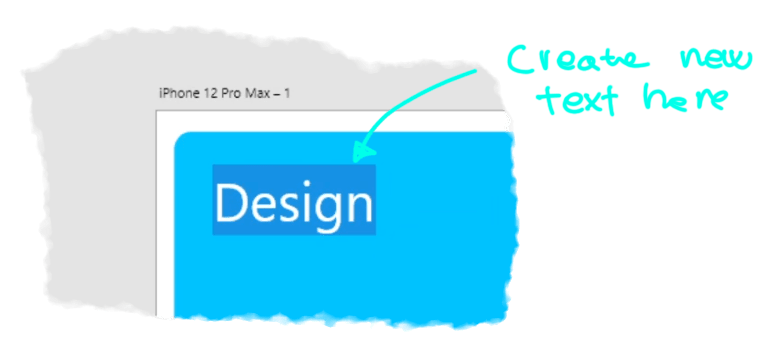
Now let's add a new text box below and.....

Prototyping
Now we are ready to create our first prototype.
Prototypes are used to test your design and to get a feel on how it will look when ended.
You have some basic actions like tap and scroll and you can create multiple connections between pages.
You have different preset resolutions, like iPhone X, Samsung Edge, etc.
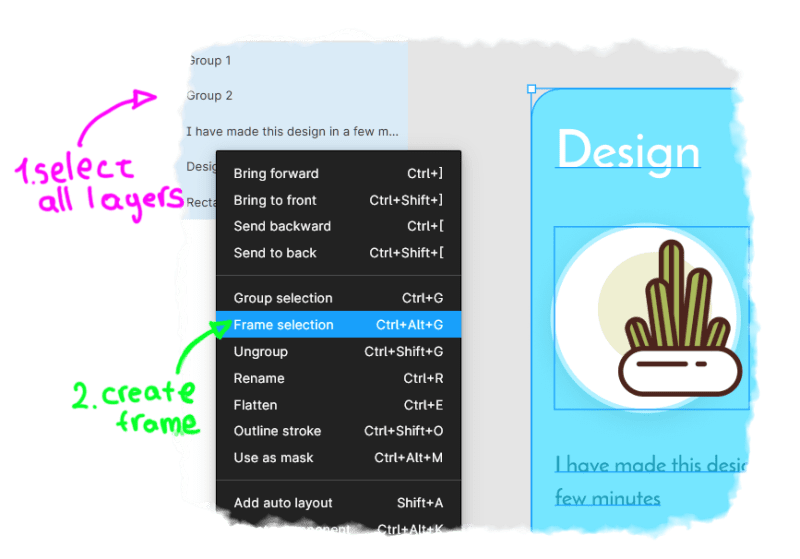
Now you should select everything and then frame it so we can use it for the prototyping phase. Basically, when you frame them you are creating a wrapper for those layers, you can also directly create a frame at the beginning by using the frame tool;
I did it now cause I wanted to make things easy and let you understand things phase by phase, but next time you could start by creating a frame directly.
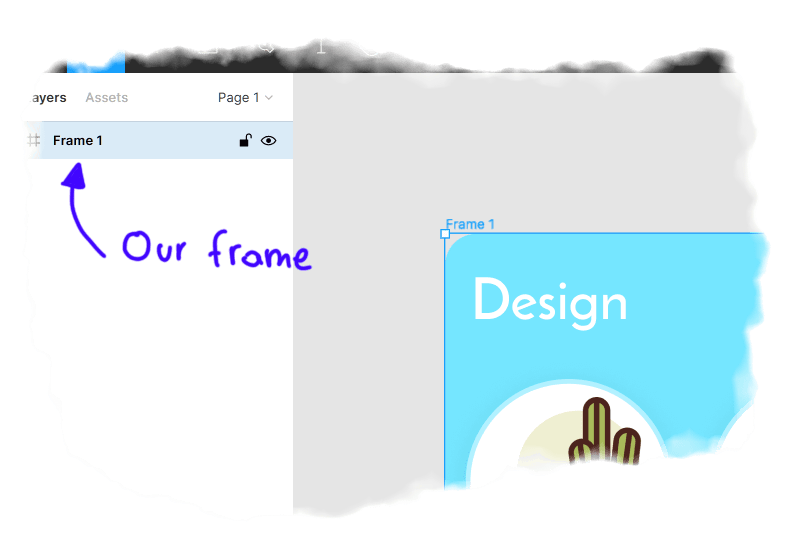
Now you should see a frame like the one in the image. If you expand it you are able to see all the layers that we have created before.
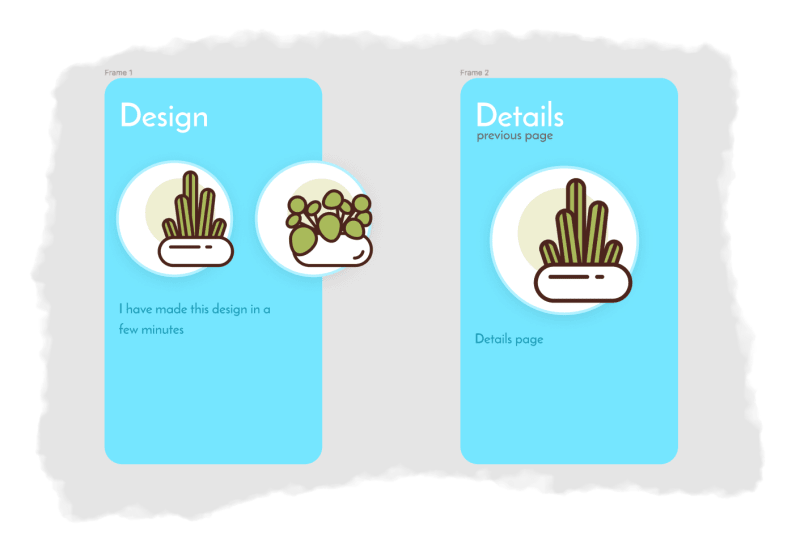
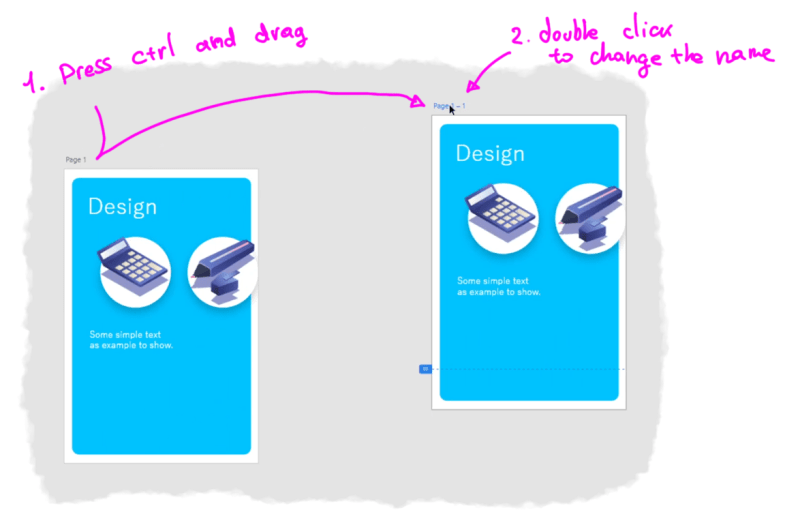
Now you have to duplicate your frame so we will have 2 similar screens;
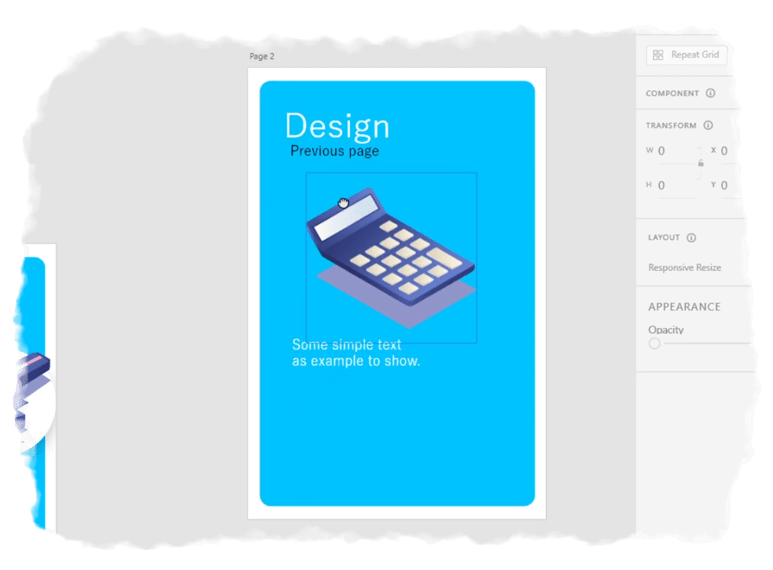
Tweek the second frame so that may represent a second phase, a page to transition to, in my example the first image represent a sort of list of images and the second screen the details page.
Under the second page, we have the previous page button so we can go back if needed.
We can make the transitions on the prototype page.
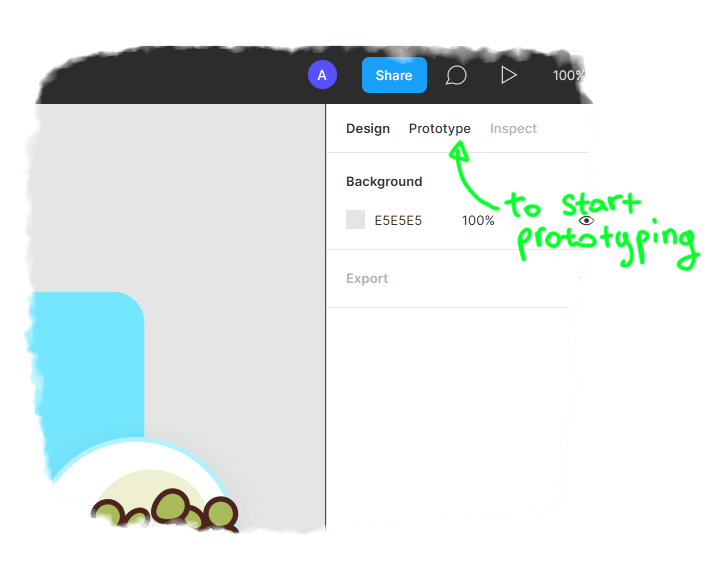
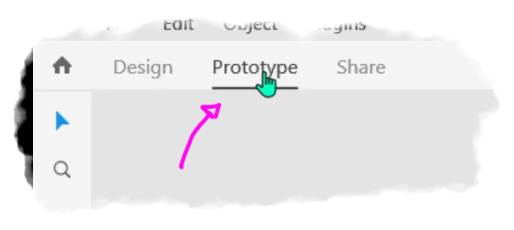
Now you are able to prototype, you should go into the prototype tab in the right panel to start.
From there you will see a bunch of options to help you tweak the settings of your proto.
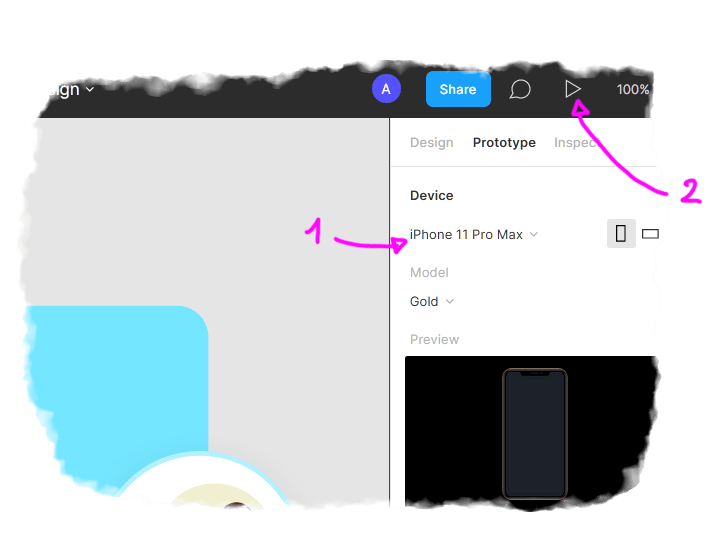
- If you want you can choose a resolution in which will be seen the result, or you can set it to the default value ‘none’.
If the resolution doesn’t match your screens you can change your frames resolution by clicking on them and tweaking the right panel width and height.
- When you are ready press the play button and you’ll see a preview of your work.
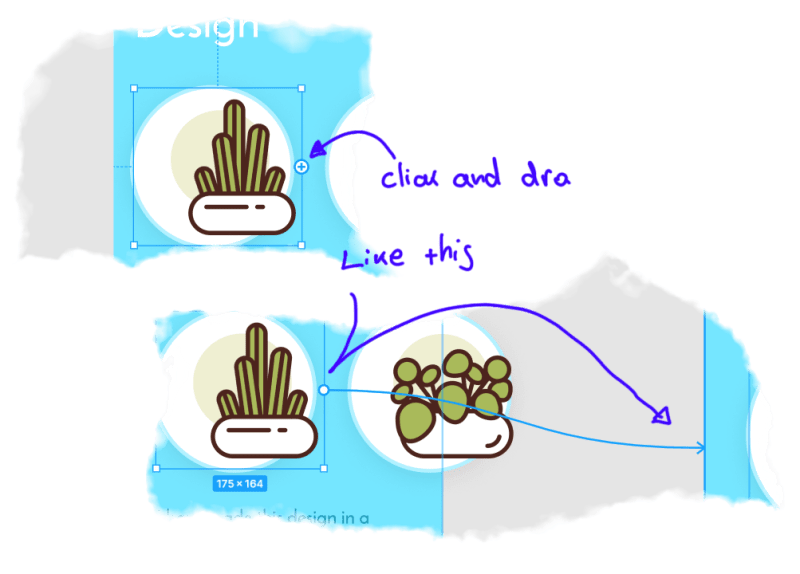
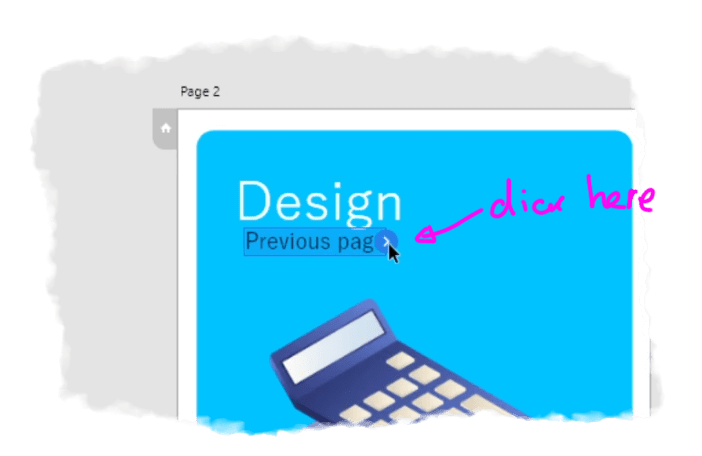
Now we can start to create our first connection. Hover over the white wrapper element and you will see a little '+' icon with a circle border.
Press is and drag until the next frame of page2 that we have cloned earlier.
You will see a new popup that will appear attached to the right panel, you will find all the settings about this specific interaction.
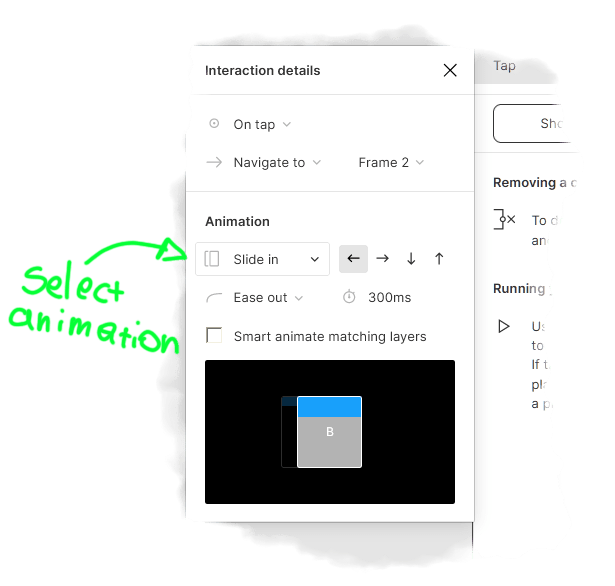
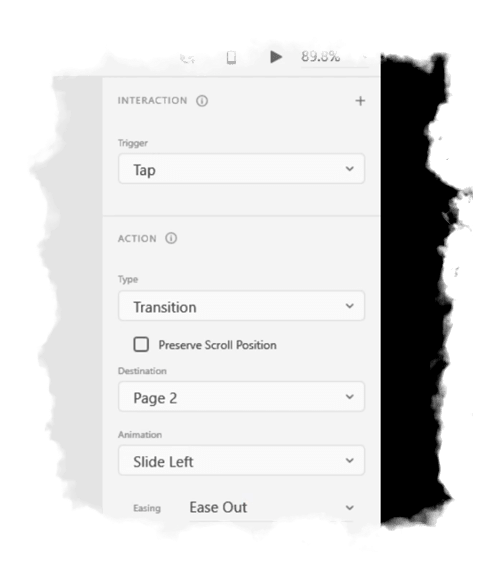
The first option is used to choose the type of option that you want to do, for example in our case we want to perform the transition action when we "tap", just to clarify more, that means, that when you tap into the box that we have connected previously you will go into the second frame as specified on the other tabs, "Navigate to", "Frame 2".
We can change our animation from the default from "instant" to slide in.
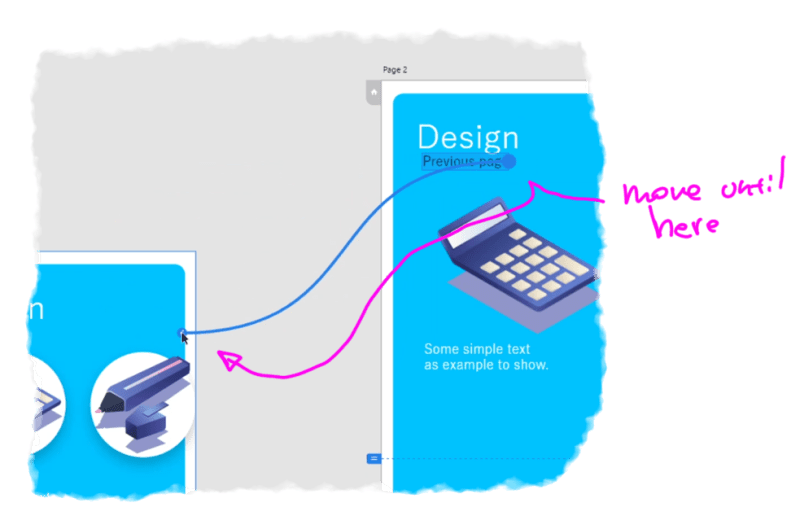
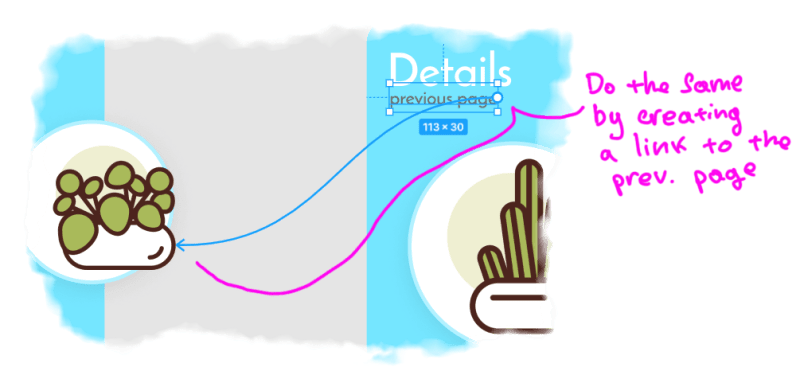 Now we want to create another interaction that can help us go back to the previous page; Just follow the previous process.
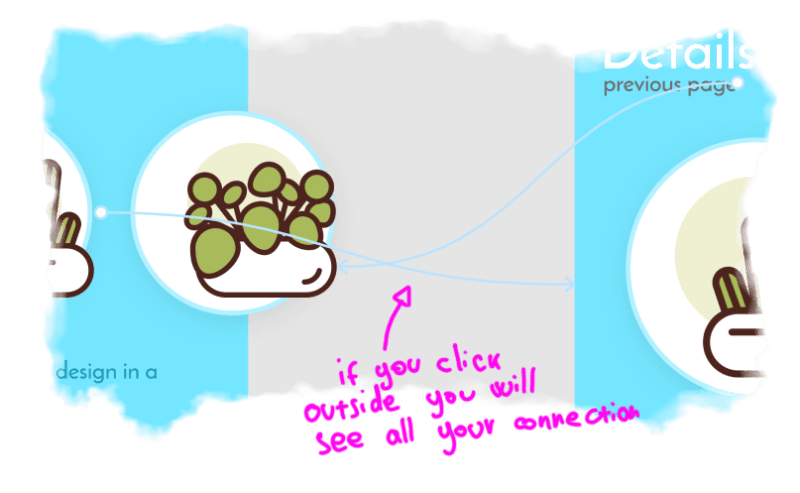
Now by clicking outside you will see all your connections and if you click on one of your connections you will see the previous popup near the right panel for tweaking the Interaction.
That's our result if you try it by clicking the play button a new popup will open up and you'll be able to try your prototype, now if you try to click on your first item you will get to the second page.
After you are on the second frame, if you click the previous page, you'll get back to the first page.
That's it, as you have assisted is not difficult and it's really to use.
Now we are going to see how to do the same process with Adobe Xd.
How to use Adobe Xd (Fast easy tutorial)
Adobe Xd must be installed and can be installed on Windows or Macintosh, documents can be saved with the creative cloud to be retrieved from other places.
I prefer Xd over Figma but this is only my opinion; Sadly I have to switch from Linux to Windows every time to work with it.
One thing that offers Adobe Xd that is not present on Figma is plugins.
Now we are ready, let's begin
From the first screen select your preferred size, I would go for the iPhone one but it doesn't matter to me since I want only to show you how to use Adobe Xd.
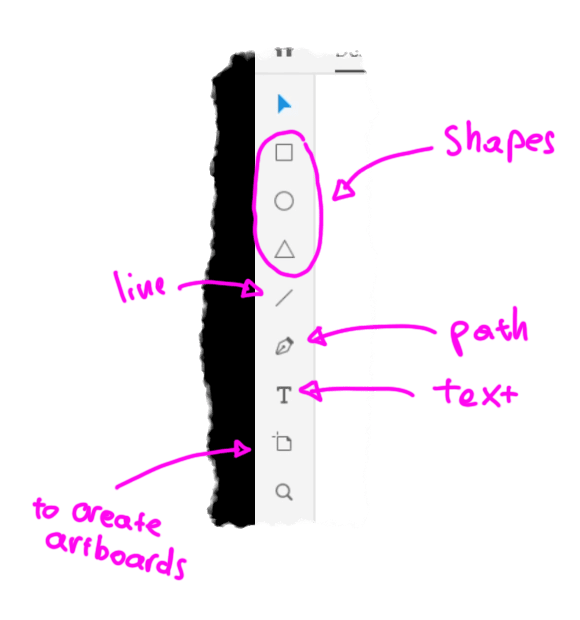
At the right you will see all the tools that you can use, you have the various Shapes that you can insert, you can use them to create complex results and group them.
The line to insert lines, the pen tool to create paths, text tool form text insertion, and at the end the artboards;
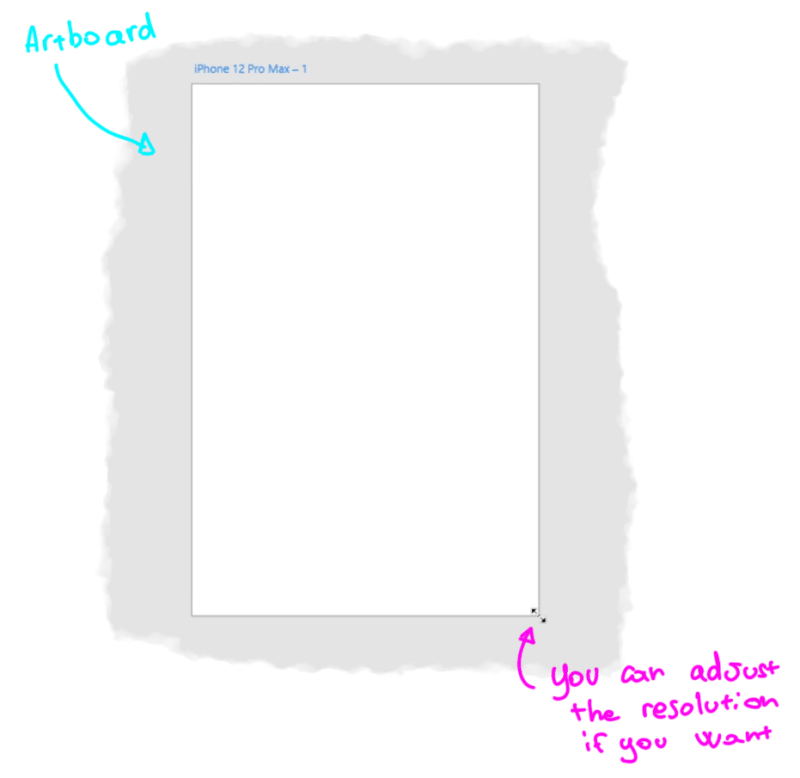
You should see the artboard as a page, for example for every screen that you have in your app you should create another page.
We are going to change the resolution, just to adapt it to our liking, you can do the same if you want.
For websites, you may want a much higher height size.
The blue dotted bar indicates how much of the viewport will be visible during the preview.
If you have for example an article page, you should drag the height of the artboard to make it let's say for example 1000px and the viewport should be the height of the device that you want to take into consideration.
During the preview, you can scroll down and up automatically, don't worry about that.
Now create a new box inside our artboard by choosing the shape rectangle from the menu.
At the right, you have the tab in which you can change the settings of any object when you click on it.
We want to change our background color. To do so, at the bottom of this panel, click the fill box, a new popup will appear.
Here you are able to select any color you like. Choose one and let's move to the next step.
You can change the radius in 2 ways; Hover over the shapes that we have created earlier and you'll see an inner dot near the border, click on it and move it up and down to change the radius.
The second way to change the radius is from the right panel.
From the tools select the text tool, it's time to create a new text for the title.
Create a simple text and change his fill color to white, we need a little bit of contrast.
Let's create a new shape for the items, let's create a box, change the radius and fill the color to white.
Try to practice without going back and to remember what we have done.
From the right panel, we want to add some light shadow.
You can change the X and Y axis to change how the shadow will be projected, Blur if you want to change the blur.
Now let's clone the box that we have just created by pressing the D button and dragging it in the right direction.
Let's add 2 images, or icons to our project by drog-n-drop, you can use this feature from result images too.
We want to put these images inside our boxes.

Now let's use the radius to make the square circle since I think that it'll look better in this way and let's adjust our images to be inside.
Select the image with the box behind and click the right mouse button and select 'group' to group them; Do the same thing with the other image.
Now you have a group of images if you want to edit it just double click it and you able to change the individual parts.
Add some text at the bottom.
We want to duplicate our artwork so we can create a second page to use when prototyping, to do so you have to press ctrl and drag to the right or any position that you want your screen to be on.
Now tweak it a little bit and you should have a new screen, add a previous page under the title so we later we can create an action to return back to our first screen if needed.
Time for prototyping
In the upper left part click the "Prototype" tab to start prototyping.
On this page you the elements will respond differently when hovering over them, you are not able to edit them, to do that you should go back to the "Design" tab.
 As you can see when you hover over the "previous page" text you will notice that a little button with an arrow will appear to the right-center part, click it and drag until you reach the first screen(Like the next image) to create a connection to the first page.
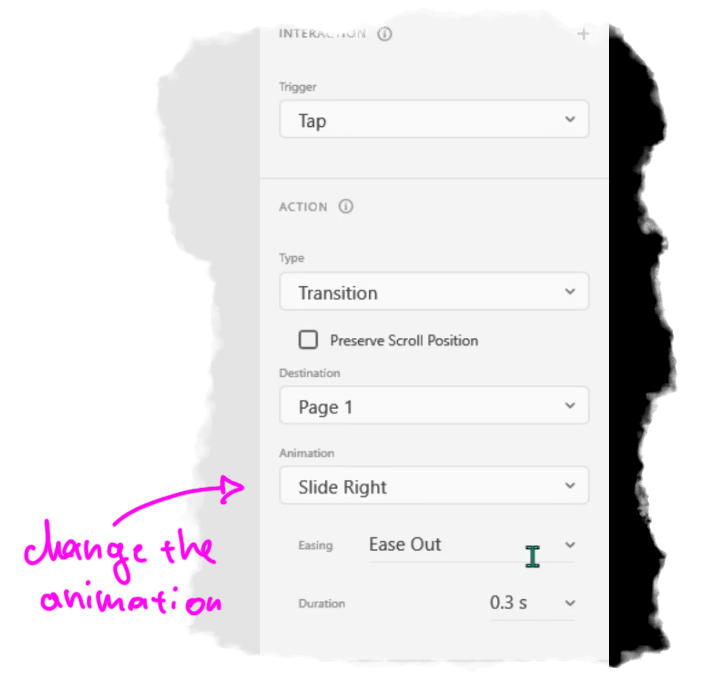
From the right tab, you can change the options about your animation, n our case we want to transition to the home page with a "Slide right" animation.
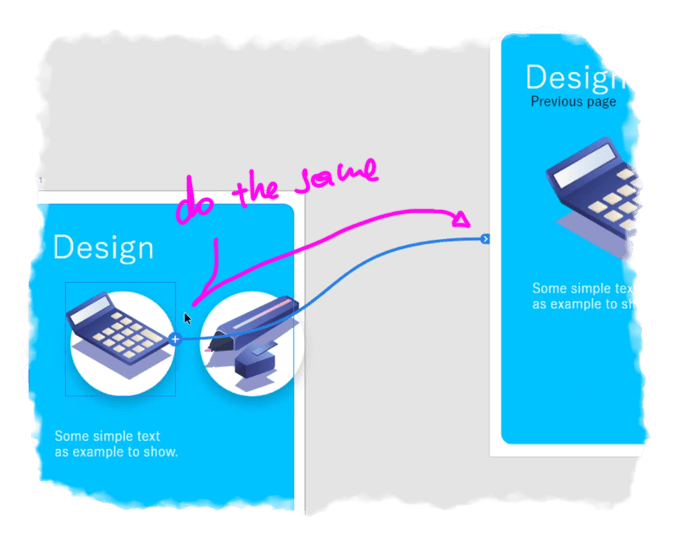 Do the same operation by creating a new connection from the first element to the second page.
You can change the settings for your animation just like before.
When you are ready and you want to try your application just head to the upper right part and press the play button.
You'll see a new window with the screen result.
This is our final result, if you try to tap on the first screen you'll go to the next page, after clicking previous you'll go back to the first screen
That's it
If you want to see more stuff be sure to check the Youtube video, I've made a connection to the second page in both tutorials, the one about Figma and Adobe Xd.
We can say that the applications are similar, with these examples you are able to choose the one that suits you.